

Ashley Baystorm Bed Assembly Instructions: A Comprehensive Guide
Finding your Ashley Baystorm bed’s assembly instructions is easy! Many retailers‚ like Michaels and Kubins Furniture‚ include a PDF link or physical copy with each purchase.
Look for “B221-52” or “B221” series IDs to pinpoint the correct guide‚ ensuring a smooth and successful build of your new bed.
Understanding the Baystorm Bed Series
The Ashley Baystorm series offers a distinctive coastal aesthetic‚ blending driftwood-inspired finishes with modern convenience. Characterized by a “smoky gray” or similar color palette‚ these panel beds aim to evoke a relaxed‚ beachy atmosphere within your bedroom.
Several models exist within the Baystorm line‚ ranging from Twin to Queen and Full sizes‚ with options for integrated storage solutions. Some beds‚ like the Queen Panel Bed with two storage drawers (available at Michaels)‚ prioritize space-saving functionality. Others‚ such as the Full 6-Drawer Storage Panel Bed from Kubins Furniture‚ maximize storage capacity.
A key feature across many Baystorm models is the inclusion of LED lighting‚ adding a subtle‚ ambient glow. This feature‚ while enhancing the bed’s aesthetic‚ also requires careful attention during assembly and potential troubleshooting. Understanding the specific model you’ve purchased – identified by series IDs like B221 – is crucial for locating the correct assembly instructions and ensuring a proper setup. Retailers like Cleveland Furniture and Sunshine Furniture carry various Baystorm options.
Available Baystorm Bed Sizes & Models
The Ashley Baystorm series caters to diverse bedroom needs with a range of sizes and configurations. Currently available models include Twin‚ Full‚ and Queen sizes‚ offering versatility for different spaces and occupants. Notably‚ Sunshine Furniture and Kubins Furniture both feature Full Panel Bed options‚ emphasizing the “beachy style” with driftwood finishes and LED lighting.
Storage capabilities vary between models. Some Baystorm beds‚ like the Queen Panel Bed sold at Michaels‚ include two integrated storage drawers‚ ideal for smaller rooms. Others‚ such as the Full 6-Drawer Storage Panel Bed at Kubins‚ provide extensive storage solutions. Identifying the specific model number (e.g.‚ B221-52) is vital when searching for the corresponding assembly instructions.
Beyond standard panel beds‚ a Youth Full Panel Bed is also available‚ catering to children’s bedrooms. Regardless of the chosen size or storage option‚ accessing the correct PDF assembly guide – often linked by retailers or included in the packaging – is essential for a successful build.

Locating the Assembly Instructions PDF
Finding the Ashley Baystorm bed assembly PDF is typically straightforward. Retailers like Michaels‚ Kubins Furniture‚ Cleveland Furniture‚ and Sunshine Furniture often provide direct links on their product pages. Look specifically for references to “Assembly Instructions” or model numbers like “B221-52” or “B221” to ensure you have the correct guide.
If a direct link isn’t available online‚ check the packaging upon delivery. Many Baystorm bed components are shipped with a physical copy of the instructions‚ and frequently‚ a QR code linking to the PDF is included. Alternatively‚ a general search online using “Ashley Baystorm bed assembly instructions PDF” along with the specific model number can yield results.
Remember that instructions may vary slightly depending on the bed size and features (e.g.‚ storage drawers‚ LED lighting). Always verify the model number matches the PDF before beginning assembly to avoid confusion and ensure a proper build.
Pre-Assembly: Inventory and Component Check
Before starting the Ashley Baystorm bed assembly‚ a thorough inventory is crucial. Carefully unpack all cartons and compare the contents against the parts list included in your assembly instructions PDF. This prevents mid-assembly frustration caused by missing components.
Identify and separate all hardware – screws‚ bolts‚ dowels‚ and specialized pieces for drawer slides or LED lighting. The PDF will detail each part with corresponding labels or diagrams. Check for any damage to the wood panels‚ headboard‚ footboard‚ side rails‚ or storage drawer components.
If any parts are missing or damaged‚ do not proceed. Contact the retailer (Michaels‚ Cleveland Furniture‚ Kubins‚ or Sunshine Furniture) immediately for replacements. A complete inventory upfront saves time and ensures a structurally sound and aesthetically pleasing finished product.

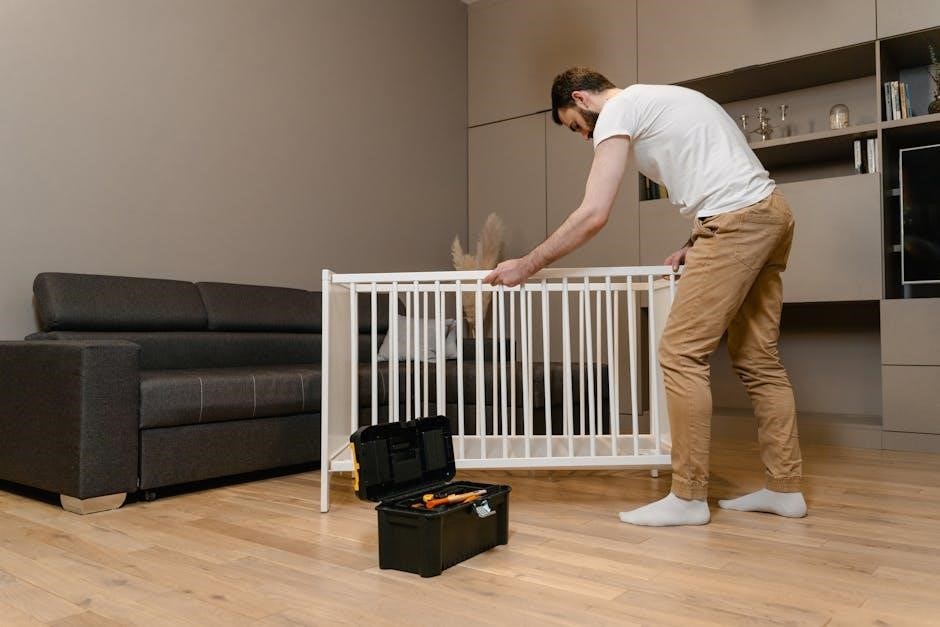
Tools Required for Assembly
Successfully assembling your Ashley Baystorm bed requires a few essential tools. While the assembly instructions PDF doesn’t explicitly list them‚ experience suggests a Phillips head screwdriver is vital for most screw types. A flathead screwdriver may also be needed for certain hardware.
A rubber mallet proves incredibly useful for gently tapping components together‚ particularly when installing dowels or securing the side rails. An electric drill with various bit attachments can significantly speed up the process‚ but use caution to avoid over-tightening and damaging the wood.
A level is essential to ensure the bed frame is perfectly horizontal‚ preventing instability. Finally‚ a soft cloth or blanket to protect the bed surfaces during assembly is highly recommended. Having these tools prepared beforehand streamlines the process‚ as detailed in the PDF guide.
Step-by-Step Assembly Process ー Headboard
Begin the assembly by unpacking the headboard components‚ referencing the Ashley Baystorm bed assembly instructions PDF for a parts list. Typically‚ this involves attaching side panels to the main headboard frame using bolts and washers. Ensure proper alignment before fully tightening.
The PDF guide will illustrate how to secure any decorative elements or upholstered sections to the headboard frame. Pay close attention to the orientation of these pieces. Next‚ attach any pre-installed LED lighting components‚ carefully connecting wires as shown in the diagrams;
Once the main structure is assembled‚ the headboard is usually ready to be connected to the side rails. However‚ always double-check all connections are secure before proceeding. The PDF provides visual aids for each step‚ ensuring a stable and aesthetically pleasing headboard assembly.
Step-by-Step Assembly Process ー Footboard
Begin footboard assembly by identifying all components as detailed in the Ashley Baystorm bed assembly instructions PDF. Similar to the headboard‚ this usually involves connecting side panels to a central footboard frame using bolts‚ washers‚ and potentially wood glue for added stability.
The PDF will guide you through attaching any decorative panels or upholstered sections‚ emphasizing correct orientation. If your model includes built-in storage drawers‚ the footboard assembly may involve additional steps to accommodate the drawer slides.

Carefully follow the diagrams to ensure proper alignment and secure fastening. Once the footboard frame is complete‚ double-check all connections before proceeding to the next stage. The PDF provides clear visuals‚ simplifying the process and guaranteeing a robust footboard structure.
Attaching the Side Rails
Refer to the Ashley Baystorm bed assembly instructions PDF for precise guidance on attaching the side rails to both the headboard and footboard. Typically‚ this involves using metal brackets and bolts‚ ensuring a secure and stable connection. The PDF will illustrate the correct placement of these brackets‚ often requiring alignment with pre-drilled holes.
Pay close attention to the orientation of the side rails; some models may have specific left and right designations. Tighten all bolts firmly‚ but avoid over-tightening‚ which could damage the wood. The instructions emphasize a snug fit to prevent wobbling or instability.

Double-check that the side rails are level and securely fastened to both the headboard and footboard before proceeding. This step is crucial for the overall structural integrity of the bed frame.
Installing the Support Slats
The Ashley Baystorm bed assembly instructions PDF details the proper installation of support slats‚ vital for mattress support and overall bed stability. These slats typically run horizontally across the side rails‚ providing a foundation for your mattress.
The PDF will illustrate the correct spacing between slats‚ ensuring even weight distribution. Some models may utilize a center support rail‚ requiring additional attention during installation. Secure the slats using the provided hardware – often plastic caps or screws – ensuring they are firmly in place.
Verify that all slats are evenly spaced and securely attached before placing the mattress. Unevenly spaced or loose slats can lead to mattress sagging and reduced bed lifespan. Refer to the diagram in the PDF for clarification on slat placement and hardware usage.
Assembling the Storage Drawers (If Applicable)
The Ashley Baystorm bed assembly instructions PDF provides detailed steps for constructing the storage drawers‚ if your model includes them. This typically involves assembling the drawer box – the sides‚ front‚ back‚ and bottom panel – using screws and cam locks as indicated in the PDF.
Pay close attention to the orientation of each piece‚ as incorrect assembly can hinder drawer functionality. The PDF will illustrate the proper sequence for attaching the drawer bottom‚ ensuring it slides smoothly into the grooves. Once the drawer box is complete‚ proceed to the next stage: installing the drawer slides.
Refer to the diagrams within the PDF for precise screw placement and component alignment. Properly assembled drawers enhance the bed’s functionality and provide valuable storage space. Double-check all connections for tightness and stability.
Drawer Slide Installation
The Ashley Baystorm bed assembly instructions PDF details drawer slide installation‚ a crucial step for smooth drawer operation. Typically‚ this involves attaching two parts to each drawer – one to the drawer box itself and the other to the inside of the bed frame.
The PDF will clearly illustrate the correct positioning of the slides‚ ensuring they align properly for effortless gliding. Use the screws provided‚ being careful not to overtighten‚ which could strip the wood or damage the slides. Precise alignment is key; misaligned slides will cause drawers to stick or wobble.

Pay attention to whether the slides are labeled for left or right sides. The PDF should provide diagrams showing the orientation. Once both sets of slides are securely attached‚ test the drawer movement to confirm proper functionality before proceeding.
Attaching Drawer Fronts
The Ashley Baystorm bed assembly instructions PDF guides you through attaching the drawer fronts‚ giving the storage drawers their finished look. This step requires precision to ensure a seamless fit and proper alignment with the bed frame.
Typically‚ the PDF will show how to align the drawer front with the drawer box‚ using screws inserted from inside the drawer box into pre-drilled holes in the drawer front. It’s vital to ensure the drawer front is centered and level before fully tightening the screws.
Pay close attention to the instructions regarding any adjustable hinges or mounting plates. These allow for fine-tuning the alignment if needed. Take your time and double-check the positioning before securing the drawer fronts permanently. A properly attached drawer front enhances both the aesthetics and functionality of your Baystorm bed.
LED Lighting Installation & Troubleshooting
The Ashley Baystorm bed assembly instructions PDF details the installation of the bed’s distinctive LED lighting. Typically‚ this involves connecting pre-wired LED strips to a power source‚ often hidden within the headboard or footboard. The PDF will illustrate the routing of the wires and the secure attachment of the LED strips.
Troubleshooting is also addressed; common issues include lights not illuminating or flickering. The instructions may suggest checking the power connection‚ ensuring all wires are securely connected‚ and verifying the LED strip isn’t damaged.
The Cleveland Furniture Company’s documentation specifically mentions “LED Trouble Shooting” as a section within the Baystorm instructions. If problems persist‚ consult the PDF for specific diagrams and contact information for Ashley’s support team. Proper installation and careful troubleshooting will ensure your bed’s ambient lighting functions flawlessly.
Weight Capacity and Safety Considerations
The Ashley Baystorm bed assembly instructions PDF outlines crucial weight capacity information for each bed size. The Queen Panel Bed with storage‚ for example‚ weighs 160lbs itself‚ but the supported weight for sleepers is a separate specification. Always adhere to these limits to prevent structural damage and ensure user safety.
Safety considerations detailed in the PDF emphasize the importance of proper assembly. Ensure all bolts are tightened securely and that the bed is placed on a level surface. Regularly inspect the bed frame for any signs of loosening or wear.
The instructions also likely advise against overloading the storage drawers‚ if applicable‚ to prevent tipping or damage. Children should be supervised around the bed during and after assembly. Following these guidelines‚ as detailed in the PDF‚ will contribute to a safe and long-lasting bed.
Common Assembly Issues & Solutions
The Ashley Baystorm bed assembly instructions PDF often anticipates common hurdles. A frequent issue reported is difficulty aligning the side rails – ensure proper orientation as shown in the diagrams. Another concern is locating all hardware; the PDF’s inventory checklist is vital here.
If drawer slides don’t align‚ double-check their installation direction and ensure the drawer fronts are properly positioned. LED lighting troubleshooting‚ also covered in the PDF‚ often involves verifying connections and bulb functionality.
Missing parts? Contact the retailer (Michaels‚ Cleveland Furniture‚ Kubins‚ Sunshine Furniture) with your series ID (B221) for replacements. If bolts strip‚ avoid over-tightening. The PDF may offer diagrams clarifying complex steps‚ and online forums can provide peer support for tricky sections.

Understanding the Warranty
The Ashley Baystorm bed’s warranty details aren’t explicitly within the assembly instructions PDF itself‚ but the PDF often directs you to Ashley Furniture’s website for comprehensive coverage information. Generally‚ Ashley warranties cover manufacturing defects in materials and workmanship for a specified period – typically one year for the entire bed.
However‚ the warranty doesn’t cover damage resulting from improper assembly. Therefore‚ meticulously following the Ashley Baystorm bed assembly instructions PDF is crucial to maintain warranty validity. Damage from misuse‚ modifications‚ or normal wear and tear are also excluded.
Keep your purchase receipt and the series ID (B221) handy when filing a claim. Retailers like Michaels‚ Cleveland Furniture‚ Kubins‚ and Sunshine Furniture can also assist with warranty inquiries‚ directing you to the appropriate channels for resolution.
Care and Maintenance of Your Baystorm Bed
Maintaining your Ashley Baystorm bed’s beauty is straightforward. The smoky gray driftwood finish‚ characteristic of many Baystorm models‚ benefits from regular dusting with a soft‚ dry cloth. Avoid harsh chemicals or abrasive cleaners‚ as these can damage the finish. The Ashley Baystorm bed assembly instructions PDF doesn’t detail cleaning‚ but gentle care extends the bed’s life.
For storage drawers‚ periodically check and tighten drawer slide screws to ensure smooth operation. Inspect the bed frame annually for loose bolts or connections‚ referencing the assembly guide if needed. If equipped with LED lighting‚ avoid excessive moisture and carefully dust the light fixtures.
Retailers like Sunshine Furniture highlight the bed’s “beachy style‚” so avoid direct sunlight to prevent potential fading. Proper care‚ combined with careful assembly following the PDF instructions‚ will keep your Baystorm bed looking its best for years.
Finding Replacement Parts
Locating replacement parts for your Ashley Baystorm bed often begins with referencing your original Ashley Baystorm bed assembly instructions PDF. This document frequently lists part numbers crucial for ordering replacements. However‚ direct contact with Ashley Furniture or authorized retailers is usually necessary.
Retailers like Michaels‚ Cleveland Furniture‚ Kubins‚ and Sunshine Furniture may stock common replacement parts‚ such as drawer slides or bolts. Providing the bed’s series ID (B221) and a detailed description of the needed part will expedite the process. Online searches using these identifiers can also yield results.
For specific components like LED lighting elements‚ contacting Ashley’s customer support directly is recommended. Keep your purchase information handy when contacting retailers or Ashley‚ as proof of purchase may be required. Careful assembly‚ guided by the PDF‚ minimizes the need for replacements.
Retailer Information & Support (Michaels‚ Cleveland Furniture‚ Kubins‚ Sunshine Furniture)
Accessing your Ashley Baystorm bed’s assembly instructions PDF can vary depending on the retailer. Michaels offers free in-store pickup and may provide the PDF with purchase‚ while delivery shipping rates are available upon request. Cleveland Furniture‚ with locations across Ohio‚ indicates assembly instructions are available (B221-52)‚ but color representation may differ from in-store viewing.
Kubins Furniture in Michigan highlights the need for assembly and the bed’s beachy aesthetic‚ referencing the PDF link for guidance. Sunshine Furniture in Oklahoma similarly emphasizes assembly requirements and the bed’s island-inspired design.
Each retailer’s support for the Ashley Baystorm bed assembly instructions PDF differs; contacting them directly is best. They can confirm PDF availability‚ assist with missing parts‚ or offer assembly advice. Remember to have your bed’s series ID (B221) ready when contacting support.
Troubleshooting LED Lighting Issues
If your Ashley Baystorm bed’s LED lighting isn’t functioning‚ consult the assembly instructions PDF for specific troubleshooting steps. The PDF‚ available from retailers like Kubins Furniture and Sunshine Furniture‚ often includes a dedicated “LED Troubleshooting” section. Begin by verifying all connections are secure‚ as loose wiring is a common issue.
Check the power source – ensure the bed is properly plugged in and the outlet is working. If using an extension cord‚ confirm its functionality. If the LEDs still don’t illuminate‚ review the PDF for information on bulb replacement or potential fuse issues.
Cleveland Furniture mentions LED troubleshooting within the Baystorm series documentation. Contacting the retailer’s support team‚ referencing the assembly instructions PDF‚ can provide further assistance if self-troubleshooting fails. Always disconnect power before inspecting or repairing the LED system.
Disposal and Recycling Information
Responsible disposal of your Ashley Baystorm bed and its packaging is crucial. While the assembly instructions PDF doesn’t directly address disposal‚ consider local regulations for furniture and electronic waste. The bed’s components‚ including wood products and potentially LED lighting elements‚ may require specific handling.
Cardboard packaging is typically recyclable; check your local recycling guidelines. Wood components can often be disposed of at designated waste facilities or repurposed. LED lighting‚ containing electronic components‚ should not be placed in standard trash. Explore electronic recycling options in your area.
Retailers like Michaels‚ Cleveland Furniture‚ Kubins‚ and Sunshine Furniture may offer take-back programs or provide information on local recycling centers. Prioritize environmentally conscious disposal methods to minimize your impact. Always adhere to local waste management regulations when discarding your Baystorm bed.